Preparations continue for our production of an Avatar, the Last Airbender fan film, centering around adventures of Iroh’s son, Lu Ten. In the film, Lu Ten travels with a band of Fire Nation scouts, and designing and constructing their costumes has been one of my tasks this year.
Because “scout” is a military rank that never appears in the animated series, and since the events events of the film will precede Aang’s return by around 7 years, I felt I could take some creative licenses with my costume designs. You may have already seen some my armor ideas in my recent concept art post.

While I did want to create unique and creative armor, another important design goal was to have the scouts be easily identified with the Fire Nation.
More than any other costume element, the helmet would make or break this recognizability.
Personally, I thought the outcome was just what I had hoped for. This post will walk you down my creative road from concept art to final production.
Design Principles: Blending the Iconic and the Original
The trouble with using a helmet to make my soldiers distinctly from the Fire Nation is that Fire Nation soldiers wear all kinds of helmets on screen!

A few of the Fire Nation helmets seen in Avatar: The Last Airbender
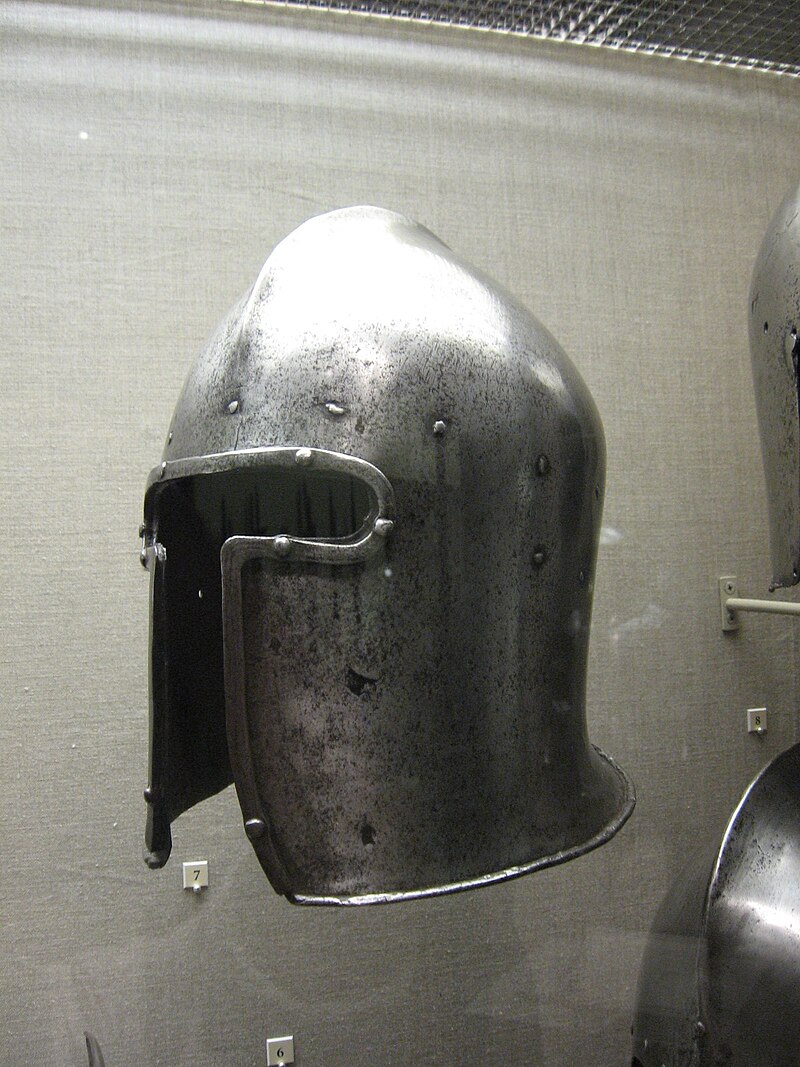
We see soldiers on screen wearing everything from spangenhelms to sugar loaf helms! The most common design, however, appears to be variations on a barbute helmet.

15th-century barbute. Image from: Wikimedia Commons.
The “barbute” (or “barbuta”) is a helmet design which covers almost the entire head except for a T-shaped opening for the eyes and mouth. Some barbutes also include a nose-guard.
I sketched out a lot of barbute designs for my fire nation soldiers, some with visors, some with masks, and some with chainmaille elements.

In the end, I decided to spruce up the basic barbute by creating a sweeping angle from the chin to the base of the skull. This emphasizes the jawline, increases head mobility (important for a scout), and gives a Spartan flair to the helmet.

Spartan helmets enhance the jawline by being longer in front than in back. Image from: Wikimedia Commons.
I made the eye openings large and round in order to maximize visibility (again, a scout’s gotta see) and to reflect the shape seen in some of the Avatar series’ more memorable Fire Nation helmets.
I also decided to add a decorative piece of leather around the T-shaped aperture to frame the face better and add some fire-like peaks to the design.
These modifications to the basic barbute design were great, but alone they made the helmet a little too reminiscent of a certain Marvel Supervillain…

A Deadpool cosplayer wearing Magneto’s iconic barbute. Image from: Wikimedia Commons.
To give a really distinctive Fire Nation look I imitated the culture’s iconic topknot hairstyle with a horse tail that emerges from the top of the helmet.
Finally, I decided to imitate another oft-repeated Fire Nation theme and add a removable face plate with vertical slits.
Once I had my final design worked out, the only trick was…how to make it…
Making a Round Helm from Flat Leather
The first hurdle in making a leather helmet is that heads are round.
…and leather is flat.
This problem is an old one for map-makers, who, since discovering that the world is in fact round, have minimized the distortion on flat maps by cutting up the world into curved pieces.

Stitch together the edges on this map and you’d get something similar to a round globe. Image from: Essaydocs.org.
I used a similar technique to rough out curved shapes I could stitch together into a head-shaped helm.
To determine what curves would match the shape of my head I started by covering the top of my noggin with plastic wrap and then with strips of duct tape. I used a marker to draw a line down the middle of my head and then other lines where it seemed the angle of my skull changed most dramatically. I then took off the cap, cut along the lines, and traced the pieces onto cardboard.
I only bothered tracing the pieces from one half of the head, and then I reversed them for the other side to make the whole thing perfectly symmetrical. To ensure that there was still a good fit, I taped together the cardboard and tried on the mock helmet.

I was pleased with the result, so I went ahead and transitioned my designs to Adobe Illustrator…and here they are for your benefit!

If you’re interested in making a helmet like mine (or Magneto’s, for that matter), and want to skip all the work I just outlined, feel free to use this template. Each square in the ruler at the bottom represents one inch. I have a 23-inch head circumference, so if you’re head is bigger you might want to scale it accordingly.
Prep Work and Stitching
Cutting out the pieces of leather was the work of only a few minutes, but in order to ensure that the final product looked professional, the assembly required several steps:
- A groove was cut at a constant distance from each of the edges of the leather pieces, using a stitching groover.

A stitching groover available from: Tandy Leather.
- The pieces were taped together as they would be in the final helmet, and I drew matching rows of dots (about 1 cm apart) down each paired set of grooves. It was important that the pieces be taped in place when I did this so that the number of dots (which would later become holes) would match, and so that the holes would line up when stitching later on. For the center seam I also made marks for the larger holes I would need for lacing in the horse tail.
- I used a 1/16″ drill bit in a dremel tool to punch out holes for stitching where I had marked each of my dots. I also used a hand-held sheet metal hole punch to make larger holes for the center lacing.
- The edges of each piece were beveled, front and back, with another specialized tool.

An edge beveler available from: Tandy Leather.
- The edges were rounded with an edge slicker. This step might seem optional, but having nice rounded edges to your leathercraft goes a long way toward making the end result look professional.

- Finally, I stitched together the pieces using a stitch commonly seen on baseballs and car steering wheels. This is my go-to when I want to draw leather edges close together without having them overlap.
The final result looked like this:


It’s not unlike a giant baseball, really, but I knew that once the leather and the thread had all been dyed the same color the effect would be a lot cooler.
Hardening and Shaping
At this point the helmet was starting to actually look…well…like a helmet, but it still didn’t have that nice round shape I wanted, and the face pieces especially tended to stick out straight forward instead of curving nicely toward the mouth.
The leather also was somewhat soft and floppy–not ideal for a helmet–so I needed to stiffen it up.
Both of these problems were easily addressed using the traditional cuir bouilli method of leather shaping and hardening.
If you want the details for this method, check out my previous post on making a leather pauldron.
In short, cuir bouilli involves dipping the leather in hot water and then letting it cool in the shape that you want.

After dipping the leather in, the hot water takes on a deep red color that actually looks quite delicious!
I wanted the helmet to fit me snugly (but not too tight), so I put on a beanie and let the helmet cool right on my head.
Later, when I made a larger helmet for others to use, I stretched the flexible wet helmet over a mannequin head instead.
Detail and Decoration
Once the helmet was hardened in the proper shape, I dyed it with the same combination of colors I used to create the dark red in all my fire nation armor and sealed it with a glossy finish.
I used a needle and thread to sew a horse tail onto the top of the helmet, then secured it in place with a ridge of gold lacing.
Confession: I originally wanted to lace over the horse tail using the same Mexican round braid pattern that I had used to decorate the edges of Lu Ten’s collar and bracers.

Unfortunately, while the lace used for Lu Ten’s outfit was made of leather, I opted for less expensive mylar lace for the scouts (cutting corners…I know…I am ashamed).
The mylar didn’t hold up very well to the complexities of the Mexican round braid, though, so to keep it looking its best I simplified the design down to a basic wrap-around. It might not be quite as fancy as Lu Ten’s armor, but then, the scouts are lower ranking anyway.
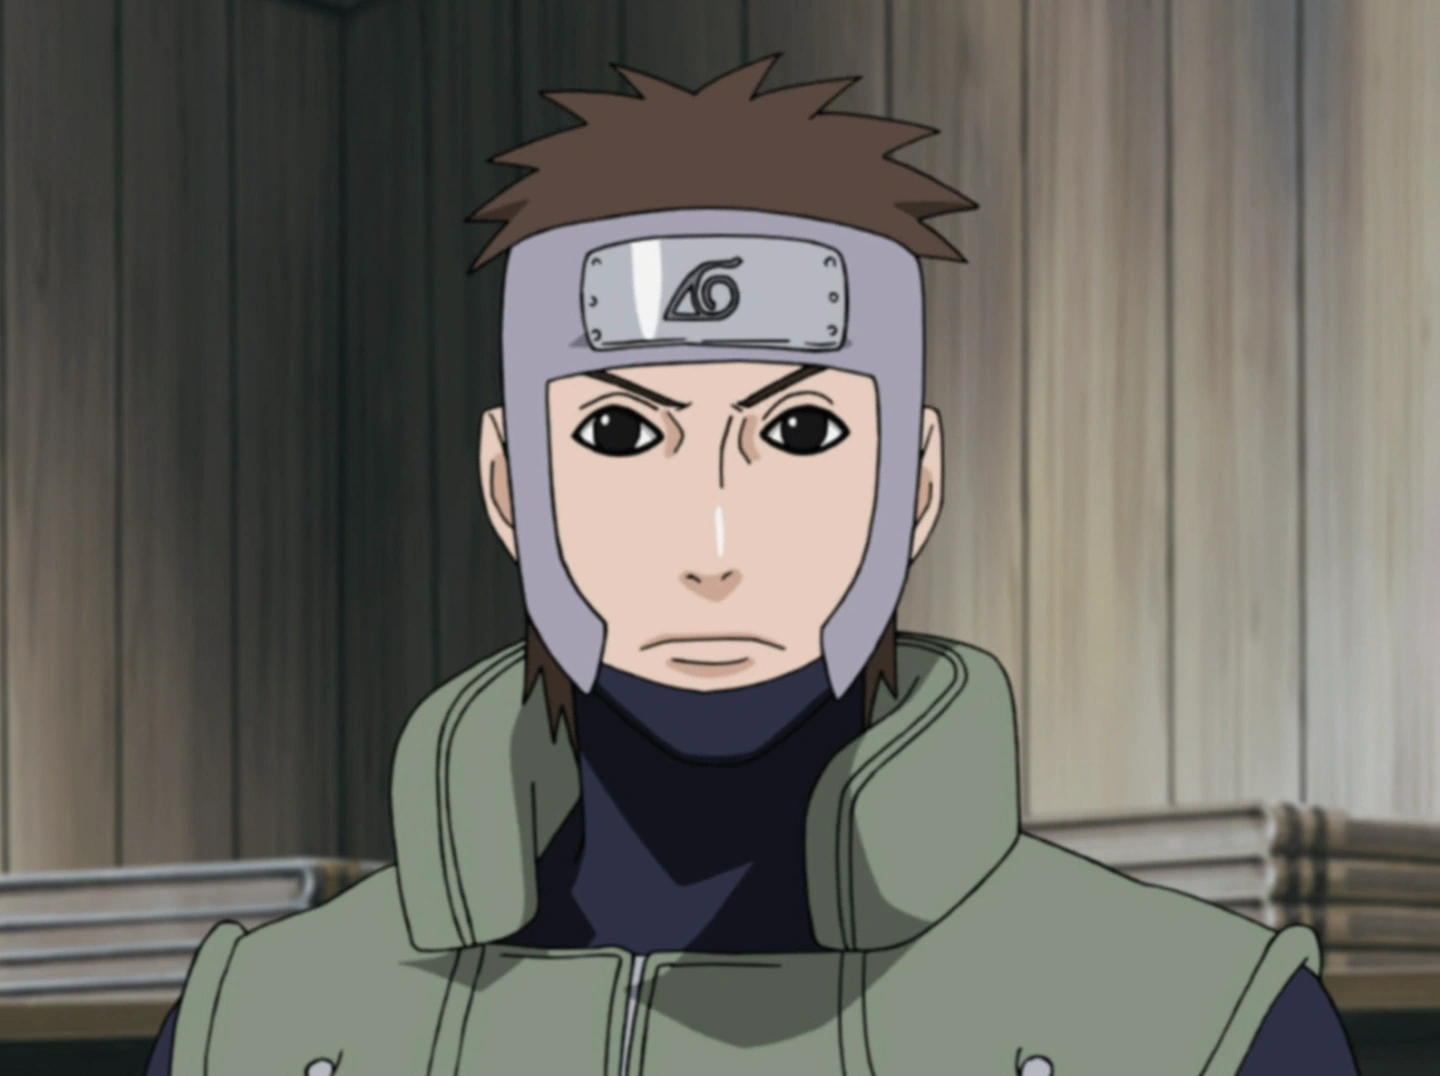
The next thing to add was the decorative leather around the face. I’m not sure if it has an official name, but I took to calling this piece the “Yamato mask,” after the character from the Naruto series.

Captain Yamato. Image from: Narutopedia.
Not sure why Yamato’s mask only covers his forehead and jaws, but it looks quite similar to my helmet’s leather face frame!

To make this decorative piece stand out from the rest of the helmet I tooled a texture onto it and painted a gold line reminiscent of the gold seen on Lu Ten’s leather tooling.

I only attached the Yamato mask to the underlying helmet at the bottom and inside borders. This way the peaks at the top and sides projected slightly, broke up the rounded profile, and gave a more fiery overall appearance.
Before stitching, however, I took a moment to insert some brass button studs facing the inside of the helmet.

These button studs were where I attached the most distinctly “Fire Nation” aspect of the whole helmet–the face mask.
Using metal shears, a handheld sheet metal punch and a jeweler’s saw, I cut out a brass mask with long slits that are reminiscent of many Fire Nation helmets. The slits in the mask also cover the soldier’s mouth, suggesting long, eerie teeth that make the wearer seem more threatening.

On the sides of the mask were slots that receive the button studs I mentioned before. This kept the mask in the right place but also made it easy to remove.
Summary
And there you have it! Once the face mask was in place, the helmet was ready to wear. All I had to do was make one more just like it and the scouts in my film were properly outfitted.

This was my first ever attempt at crafting a helmet, and I was quite pleased with the result. If you’d like to make a leather helmet of your own, feel free to use my designs or draw inspiration from this post.
I’d love to hear any questions you might have about the creative process. Just drop me a comment below!


