One of my favorite things to do is combine form and function in my art.
A few weeks ago I posted to describe how I came up with designs for a set of original Star Trek Tri-dimensional chessmen.
That artistic adventure was all about form–requiring pieces that at once felt futuristic and yet hearkened back to familiar traditional designs.
The function of the project, however, was almost all in the board.
The chess board (or rather, boards, since there were seven of them) took about a week to create and required a number of tools that I don’t have in my shop yet, so I want to give a special thanks to my 87-year-old friend Bob “Pappy” Barney for helping it turn out so well!
Rules of Engagement
When I start a project, I usually guide my creativity with some “rules”–the major functional objectives of the creation. For example, when I was making an Airbending staff my rules included that it had to fit evenly in the hand and transform from glider to staff simply and without endless stuffing of fabric.

The final, fully functional staff design.
For the chess board, however, the “rules” for what it needed to be able to do were actually just that–literal gameplay rules!
History of Tri-Dimensional Chess
In Star Trek: The Original Series the tri-dimensional chess board is used merely as a prop, and the actors move their pieces at random.
In 1976, however, the official “Star Trek Technical Reference Manual” was printed for the benefit of fans, and included instructions on how to build a tri-dimensional chess board.
Avid Trekkie Andrew Bartmess was disappointed to find that the manual included no instructions on how to play the game, and wrote to the book’s author, Franz Joseph Schnaubelt, to request them. Schnaubelt replied, encouraging Bartmess to come up with the rules himself.
After much contemplation of the moves players are seen making in the series, the arrangement of boards seen in the series, standard chess rules, and flow of play, Bartmess created a set of rules which have become the basis for almost every variant of the game now played in houses and tournaments around the world!
Board Set-up
Without getting too deep into the nuts and bolts of gameplay, there are a few concepts that need to be understood in order to construct a functional board.
First, just like traditional chess, the tri-dimensional version has 64 total squares–32 white and 32 black. These are divided into three stationary 4×4 boards and four moveable 2×2 “attack” boards.
The three stationary boards directly overlap like so, with the back two rows of a lower board lining up perfectly below the front two rows of the board above:

Board set-up at start of game. Image from: Chessvariants.com.
The moveable “attack” boards start in the far corners, but as the game progresses they can be moved above or below any corner of any stationary board. You can even have an attack board both above and below the same corner of a stationary board. The only stipulation is that the attack board needs to be aligned so that the square overlapping the stationary boards is always the same color as the squares it overlaps.

Possible attack board movements. Image from: Chessvariants.com.
Here is what the board looks like at the beginning of play:

To create a fully functional board, I needed to build in a system for easily moving attack boards that would would allow them to be inverted and let two share the same corner if need be.
Even more importantly, I needed to scale the board so that the tallest piece (the king) could fit both below and above an attack board without bumping into the board above.
In Star Trek: The Original Series fairly short chessmen and acrylic boards are used, allowing the board to maintain a relatively low profile.

With a 4″ king my pieces were much loftier, however, and the wooden boards were necessarily much thicker, requiring a taller design.
After the chess set was finished I drew up the following schematics on Adobe Illustrator to ensure ideal space both above and around all the pieces:

The moon-shaped pieces seen here were intended to be stylized struts adding support to the design, but were later abandoned as unnecessary.
How it Was Made
Once my designs were finalized I started construction by purchasing hardwood boards with natural colors matching the game pieces which I had already created.
Conveniently, I had made the white pieces out of yellowheart wood, which is sometimes used in flooring, so a perfect match was possible. The black pieces were harder to match exactly and I ended up simply buying the darkest hardwood board I could get in my budget.
The Frame
The game’s frame was made of three main pieces:
First, a yellow piece, shaped like a Star Trek Federation chevron, sits at the base, and two long struts rise from it to hold up the boards.

In the Star Trek series only one support strut is used, placed in the middle of the board, but since my design was taller than that seen on screen and because my boards were thick wood rather than thin acrylic I opted for more support to maximize stability of a heavy (and especially top-heavy) design.
Each piece was traced onto the wood and cut out using a band saw. The band saw work was done with a single cut to leave as much uncut wood left over as possible (I’d be using it to make the checkered boards later).
The two matching struts were then clamped together as if they were one piece, and the shapes were refined using a variety of belt and rotating power sanders. By keeping the pieces together during this process I ensured that they would turn out as close to identical as possible, which would be critical if the boards were to lie level.
After sanding and finishing each piece, the frame was assembled by means of screws counter-sunk into the bottom of the base and extending vertically into each strut.

I opted to avoid the use of glue so that the final product could be easily disassembled for transport if necessary.
The Checkerboards
Each board was constructed by the standard method for all chessboards.
Rather than cutting up a bunch of tiny squares and then trying desperately to line them all up perfectly with a million clamps while glue squirts everywhere, wooden chess boards are best made as follows:
- Use a table saw to cut white and black strips of wood.

- Refine the sawn edges with a jointer to ensure they’ll fit together perfectly.
- Glue the strips together, alternating white and black. Clamp them firmly so that there will be no cracks. Line up the grain from both white and black woods, as this will both look good and will produce better results when planing/jointing/sanding later on.

- Use the same table saw setup to cut new strips perpendicular to the first ones.

- Again, use the jointer to perfect the sawn edges.
- Flip every other strip over to create a checkered pattern and glue them together like before. If you lined up your wood grains in step 3 then they should still be aligned now.

- Run the complete board through a surface planer to smooth out any small discrepancies in height between squares.
If you’re still at all confused about this process, check out this video, which provides a very clear explanation!
This method worked perfectly (after a bit of trial and error) for both my 2×2 and 4×4 boards, and would work just the same for any board dimensions.
Attack Board Assembly
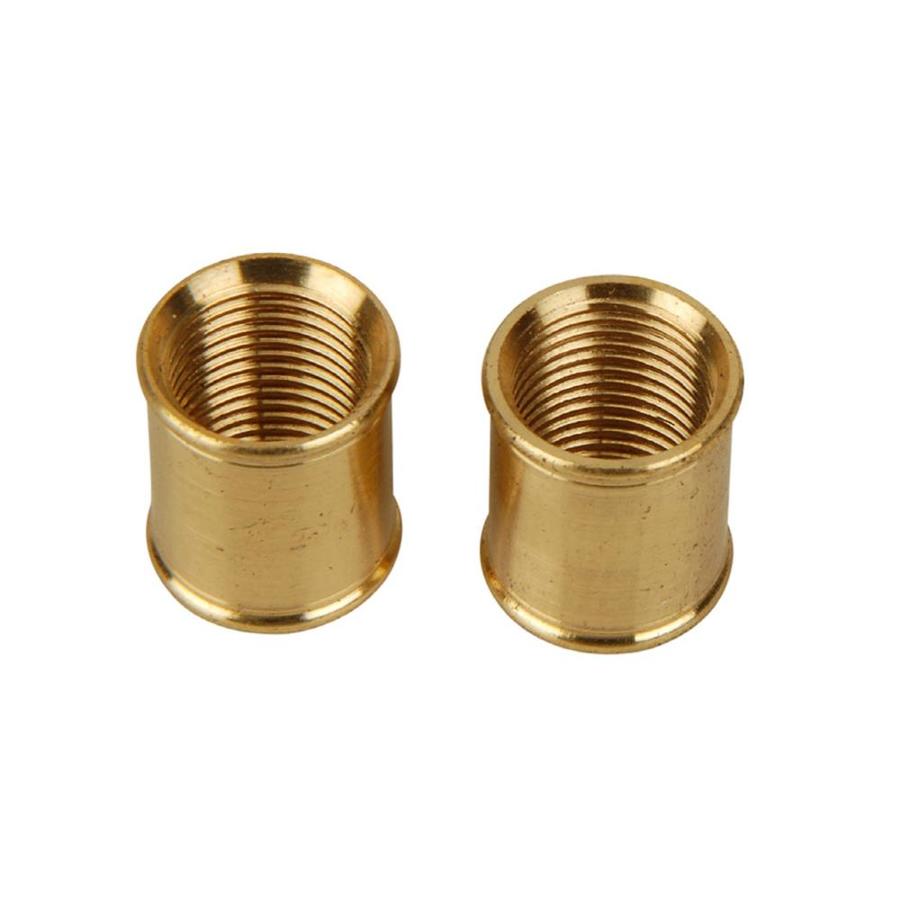
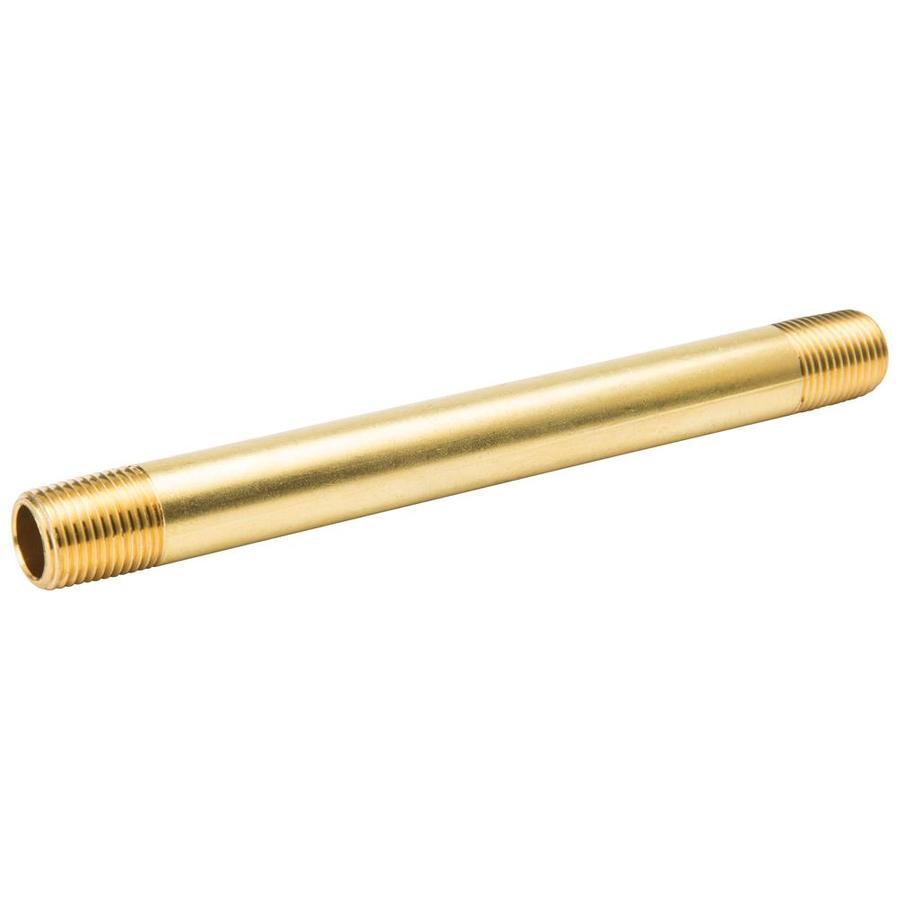
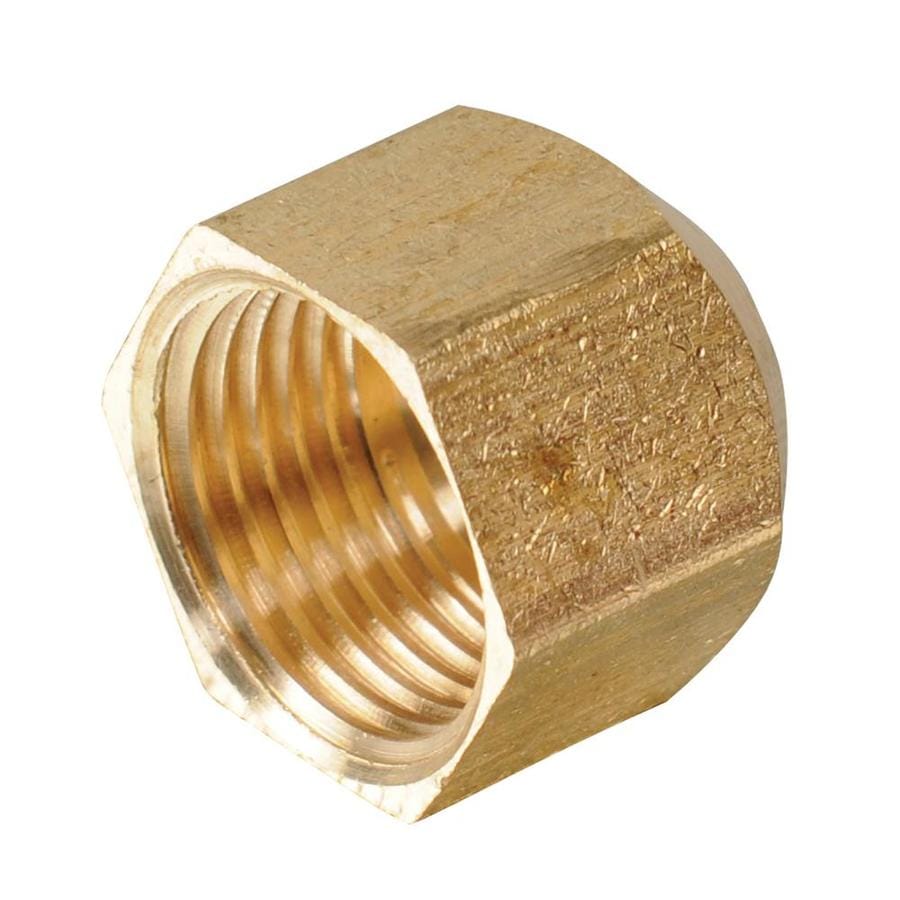
To make the Attack boards moveable to each required position I used the small threaded brass pipes, couplings, and end caps used for lamps and small plumbing jobs. I was able to pick up all the pieces I needed at my local hardware store (well…two stores, actually, since I cleaned out the stock of the first one).


I used a drill press to put vertical holes straight through each corner of my larger boards. I also drilled half-way through the center of each attack board on the side I planned to make the “bottom.”
Before drilling any holes on my actual game I practiced on several pieces of scrap wood to ensure that the brass fittings would fit perfectly into the holes provided for them.
Round couplings went into the corner holes of the large boards. Hexagonal end-caps went into the pits I’d drilled at the bottom of the attack boards. Since this was a bit of a “square peg round hole” situation I refined the shape of the hole with my dremel tool to improve the fit.

Each coupling was secured with a little expanding gorilla glue to lock it in place. I actually glued the attack board end caps with the whole board assembled and a bubble level on top to ensure that the little 2×2 board would sit perfectly level during game-play.
Putting it All Together
At this point all that was left to do was assemble the completed project!
The boards were attached to the struts with double-sided tape. This was strong enough to prevent any wobble, but could be cut off for disassembly if necessary. The threaded brass fittings worked like a charm and allowed free movement and secure positioning of each attack board in both vertical and inverted positions.
Once the custom pieces were added, the completed project came together just as I had hoped it would!

The tall, abstract shape looks like 23rd-century modern art, and yet the hand-made wooden components add a rustic feel that hearkens back to 18th century vintage!
I guess that’s what they mean when they call some art “timeless!”


